How to draw a red square in Magnum — in one statement
After reading the “How to draw a red square in Qt Quick” blog post showcasing the simplicity of Qt API I thought it would be interesting to try something similar in Magnum for comparison.
The following statement creates and renders a red square in Magnum. The statement is wrapped on four lines for better readability:
MeshTools::compile(Primitives::squareSolid()))
    .draw(Shaders::Flat2D{}
        .setTransformationProjectionMatrix(Matrix3::scaling({0.2f, 0.3f}))
        .setColor(0xff0000_rgbf));
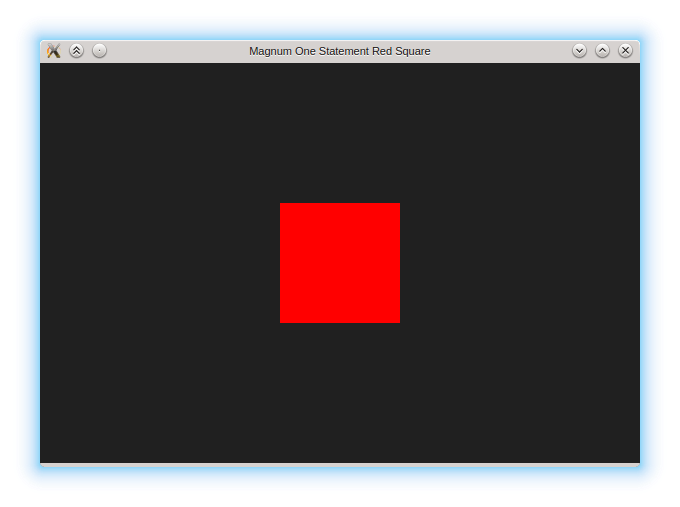
Copy-pasting it into draw event of the basic boostrap application
and doing a bunch of #include and library linking bureaucracy will
result in this image:
import QtQuick 2.0

Item {
    Rectangle {
        color: "red"
        width: 100
        height: 100
        x: 100
        y: 100
    }
}
Be sure to read the original blog post as well so you can do a fair comparison. The code in question is above.
The Qt Quick code, shown on the right, is slightly shorter, but the C++ version of comparable performance shown in the post is far more verbose in Qt than in Magnum. A couple things worth noting:
- Unlike in the Qt code we aren’t using any scene graph but do everything directly. In this particular case the scene graph would complicate things rather than make them simpler.
- Thanks to expression-oriented (and not statement-oriented) API and method chaining it’s possible to concatenate many calls on one line.
- In C++ all temporaries are kept until the end of the statement (the
;character), so the code doesn’t rely on any undefined behavior, even though it might look like that. - This is obviously only performant as an one-off draw, recreating all objects every frame wouldn’t be exactly efficient.
- This exact thing can be done even simpler (and faster) using scissor test and framebuffer clear, but that’s not the point.
The following code is the exact equivalent of the above, with explicit temporaries for better understanding:
Trade::MeshData2D meshData = Primitives::squareSolid();
GL::Mesh mesh = MeshTools::compile(meshData);

Shaders::Flat2D shader;
shader.setTransformationProjectionMatrix(Matrix3::scaling({0.2f, 0.3f}))
      .setColor(0xff0000_rgbf);

mesh.draw(shader);
The setup and actual drawing is now clearly separated. You can now see that we abused method chaining to create, configure and pass the shader to GL::Mesh::draw() in a single expression, but that’s a perfectly legal thing to do. Having 2D equivalents of everything also makes things a bit simpler, on the other hand displaying a 3D cube would only need a different primitive, a different shader with more involved configuration and enabling the depth test. The code is also as fast as it could get, unless you have a very specific use case (like drawing thousands of squares in a particle system).
Going deeper
As noted before, there is precisely no lower level in which we could do things more efficitently. The only lower level are raw OpenGL calls, which would have comparable performance but with far more verbosity and less error checking. The only thing we can do is to recreate parts of the setup by hand.
Manually creating the mesh
The MeshTools::compile() function is an all-in-one tool for creating
generic meshes from imported data. In this case the preparation is very simple,
so we can replace it with the following. Note that we need only the vertex
buffer (the index buffer above was nullptr as it was also not needed).
constexpr Vector2 data[]{{ 1.0f, -1.0f}, { 1.0f,  1.0f},
                         {-1.0f, -1.0f}, {-1.0f,  1.0f}};

GL::Buffer buffer;
buffer.setData(data);

GL::Mesh mesh{MeshPrimitive::TriangleStrip};
mesh.setCount(4)
    .addVertexBuffer(buffer, 0, Shaders::Flat2D::Position{});
Manually creating the shader
The stock Shaders::Flat2D shader internally employs a bunch of compatibility stuff to make it working on all supported OpenGL, OpenGL ES and WebGL systems. To make things simpler we will restrict our shader to GLSL 4.30 only. Also all error checking is omitted for brevity:
struct FlatShader: GL::AbstractShaderProgram {
    typedef GL::Attribute<0, Vector2> Position;

    FlatShader() {
        GL::Shader vert{GL::Version::GL430, GL::Shader::Type::Vertex};
        vert.addSource(R"GLSL(
layout(location = 0) uniform mat3 matrix;
layout(location = 0) in vec4 position;

void main() {
    gl_Position = vec4(matrix*position.xyw, 0.0).xywz;
}
)GLSL").compile();

        GL::Shader frag{GL::Version::GL430, GL::Shader::Type::Fragment};
        frag.addSource(R"GLSL(
layout(location = 1) uniform vec4 color;
out vec4 fragmentColor;

void main() {
    fragmentColor = color;
}
)GLSL").compile();

        attachShader(vert);
        attachShader(frag);
        link();
    }

    FlatShader& setTransformationProjectionMatrix(const Matrix3& matrix) {
        setUniform(0, matrix);
        return *this;
    }

    FlatShader& setColor(const Color4& color) {
        setUniform(1, color);
        return *this;
    }
};
The actual code is then just slightly modified to use our shader, i.e.
FlatShader instead of Shaders::Flat2D:
// ...

GL::Mesh mesh{MeshPrimitive::TriangleStrip};
mesh.setCount(4)
    .addVertexBuffer(buffer, 0, FlatShader::Position{});

FlatShader shader;
shader.setTransformationProjectionMatrix(Matrix3::scaling({0.2f, 0.3f}))
      .setColor(0xff0000_rgbf);

// ...
Conclusion
The code above shows that:
- The library is low-level, but low-level doesn’t neccessarily mean verbose.
- Higher-level concepts are built on top of lower-level features, they are not replacing them. So when you want to e.g. use scene graph, you just take your lower-level code as is, wrap it in the SceneGraph API and you are done.
- Many features are there to simplify common tasks (such as pre-made primitives or stock shaders), but it doesn’t mean that they will get in the way when you want to do something more involved.
- Significant portions of the library can be replaced with custom or lower-level solutions and the rest of the code will just work with them.
That’s all. Happy hacking!