A new example showcases capabilities of the DART integration. Let’s dive into robotics, explain what DART is able to do and how it compares to Bullet.
What is a robotic manipulator?
A robotic mechanism is constructed by connecting rigid bodies, called links, together by means of joints, so that relative motion between adjacent links becomes possible. Actuation of the joints, typically by electric motors, then causes the robot to move and exert forces in desired ways. Additionally, there exist several sensors that allows us to read the current position, velocity or torque of an actuator.
A robotic manipulator is a robotic mechanism where its links are arranged in serial fashion, that is, they form what we call an open-chain. Without going very deeply into the mechanical details behind the actual machines and without loss of generality, for the remaining of this post a robotic manipulator can be described fully by the mass and inertia properties of its links, its kinematic configuration, its joint positions and its joint velocities. Moreover, we will assume that our manipulators can be control either via torque or velocity commands.
What is this example about?
Before moving on, let us see what we can do in this example (and what we will explain in this post):
As we can see in the video, our example world consists of a robotic manipulator with a gripper attached in its end-effector (that is, the last link in the serial chain) and three small colored boxes. The user can control the manipulator with intuitive commands (e.g., move over the red box or move up/down) and pick up the small boxes to create some towers. They can even destroy the ones that they created!
We will split the post into two main directions: (a) explaining how to use the DartIntegration (and some basic usage of DART), and (b) explaining the basics of the controller developed for this task (from a robotics perspective).
Using the DartIntegration
Dynamic Animation and Robotics Toolkit (DART) is an open-source library that provides data structures and algorithms for kinematic and dynamic applications in robotics and computer animation. Since its main focus is robotics applications, every entity in a DART world is a kinematic skeleton, that is, a collection of links interconnected with joints. Each joint can be actuated with different types of actuation (force or torque, velocity, position) or it can be fixed. DART additionally support non-rigid bodies/links, but we will only consider robots with rigid body links in this post. In DART everything begins by creating an empty world:
auto world = dart::simulation::WorldPtr(new dart::simulation::World);
Inside this imaginary world, our robots will live and flourish. The next step is to create our robots. In DART, even the small boxes that have no actuation are considered as a kinematic skeleton. Let us create our fist “robot” box (for more details on how to use DART, please follow their tutorials):
/* The size of our box */
constexpr Double boxSize = 0.06;

/* Calculate the mass of the box */
constexpr Double boxDensity = 260; // kg/m^3
constexpr Double boxMass = boxDensity*Math::pow<3>(boxSize);

/* Create a Skeleton and give it a name */
dart::dynamics::SkeletonPtr box = dart::dynamics::Skeleton::create("box");

/* Create a body for the box */
dart::dynamics::BodyNodePtr body =
    box->createJointAndBodyNodePair<dart::dynamics::FreeJoint>(nullptr).second;

/* Create a shape for the box */
auto boxShape = std::make_shared<dart::dynamics::BoxShape>(
    Eigen::Vector3d{box_size, box_size, box_size});
auto shapeNode = body->createShapeNodeWith<
    dart::dynamics::VisualAspect,
    dart::dynamics::CollisionAspect, dart::dynamics::DynamicsAspect>(box_shape);

/* Give a color to our box */
shapeNode->getVisualAspect()->setColor(Eigen::Vector3d{1.0, 0.0, 0.0});

/* Set up inertia for the box */
dart::dynamics::Inertia inertia;
inertia.setMass(box_mass);
inertia.setMoment(box_shape->computeInertia(box_mass));
body->setInertia(inertia);

/* Setup the center of the box properly */
box->getDof("Joint_pos_z")->setPosition(box_size/2.0);
The are several steps that we need to take in order to create a robot (in DART but in general also). Imagine if we have to create a robot with multiple links and joints! For that reason, several conventions have been defined and used in the robotics community. The most popular ones are the Denavit–Hartenberg parameters and the product of exponentials formula (that is based on the screw theory; for more information please refer to the Modern Robotics book by Kevin M. Lynch and Frank C. Park).
Universal Robot Description Format
Nevertheless, these are still mathematical formulas and they require quite some work to manually perform all the computations. DART (and most robotic simulators) already have some of the two conventions implemented and require from the user to give only the relative transformation from each link to their “parent” joints and from the joints to their “child” links. This greatly simplifies the life of the user, but still writing this in C++ code is demanding and error prone (just have a look at the code above to create a simple box). For this reason, several description formats have arised over the years that try to make it easier and more intuitive to create your robots.
One of the most popular formats is the Universal Robot Description Format (URDF) that is part of the Robotics Operating System (ROS) framework. URDF is an XML format for representing a robot model; for more details, please have a look at the ROS wiki. Here is how a part of the URDF model of the manipulator that we are going to use looks like:
<!-- link 0 -->
<link name="iiwa_link_0">
  <inertial>
    <origin rpy="0 0 0" xyz="-0.1 0 0.07"/>
    <mass value="5"/>
    <inertia ixx="0.05" ixy="0" ixz="0" iyy="0.06" iyz="0" izz="0.03"/>
  </inertial>
  <visual>
    <origin rpy="0 0 0" xyz="0 0 0"/>
    <geometry>
      <mesh filename="package://iiwa14/link_0.stl"/>
    </geometry>
    <material name="Grey"/>
  </visual>
  <collision>
    <origin rpy="0 0 0" xyz="-0.01 0 0.07875"/>
    <geometry>
      <box size="0.24 0.23 0.1575"/>
    </geometry>
    <material name="Grey"/>
  </collision>
</link>
<!-- joint between link 0 and link 1 -->
<joint name="iiwa_joint_1" type="revolute">
  <parent link="iiwa_link_0"/>
  <child link="iiwa_link_1"/>
  <origin rpy="0 0 0" xyz="0 0 0.1575"/>
  <axis xyz="0 0 1"/>
  <limit effort="320" lower="-2.96705972" upper="2.96705972" velocity="1.4835298"/>
  <dynamics damping="0.5"/>
</joint>
<!-- link 1 -->
<link name="iiwa_link_1">
  ...
</link>
This is to get an idea of how a URDF file would look like; no need to understand it!
Loading a URDF model with DART
Assuming that we have in our possession the URDF model of our robot, here is how to load it with DART:
/* DART: Load Skeletons/Robots */
DartLoader loader;
/* Add packages (needed for URDF loading): this is a ROS-related thing in
   order to find the resources (e.g., meshes), see the "package://" in the
   URDF file above */
loader.addPackageDirectory("name_of_package", "path/to/package");
std::string filename = "path/to/URDF/file";

/* Load the URDF in a DART Skeleton */
auto manipulator = loader.parseSkeleton(filename);
The KUKA LBR Iiwa manipulator URDF that we used is a modified version of the one in the iiwa_ros package. The Robotiq gripper 2F-85 URDF that we used is a modified version of the one in the robotiq_arg85_description package. Once we have loaded/created all our robots, we add them to the DART world:
/* Add the robot/objects in our DART world */
world->addSkeleton(manipulator);
world->addSkeleton(floorSkel);
world->addSkeleton(redBoxSkel);
world->addSkeleton(greenBoxSkel);
world->addSkeleton(blueBoxSkel);
How does DART connect to Magnum?
DART connects to Magnum through the SceneGraph library, similar to how BulletIntegration does it. DART integration provides two main classes: (a) DartIntegration::World, and (b) DartIntegration::Object. The most common usage will be something like the following:
/* DART world */
dart::simulation::WorldPtr dartWorld{new dart::simulation::World};

// ... add robots and objects into DART world ...

/* Create our DartIntegration object/world */
auto dartObj = new Object3D{&_scene};
auto world = std::make_unique<DartIntegration::World>(*dartObj, *dartWorld));

/* Simulate with time step of 0.001 seconds */
world.world().setTimeStep(0.001);

for(UnsignedInt i = 0; i < simulationSteps; ++i) {
    world.step();

    /* Update graphics at ~60Hz (15*0.001 ~= 60Hz) */
    if(i % 15 == 0) {
        world.refresh();

        /* Get unused/deleted shapes */
        std::vector<std::unique_ptr<DartIntegration::Object>>& unusedObjects
            = world.unusedObjects();

        /* The user is expected to handle unused objects. One possible
           handling would be to remove them from the parent scene. */
        deleteObjectsFromScene(unusedObjects);

        /* Get updated shapes -- ones that either the materials or the
           meshes have changed */
        std::vector<std::reference_wrapper<DartIntegration::Object>>
            updatedObjects = world.updatedShapeObjects();

        updateMeshesAndMaterials(updatedObjects);

        /* Clear list of updated objects */
        world.clearUpdatedShapeObjects();
    }
}
In essence, the user needs to handle the deleted objects and the ones that need to be updated. In our example, nothing should be deleted and thus we do not handle the deleted objects. In order to draw the meshes of our robots, we need to create a structure. We will assume a Phong shader and create the following class:
class DrawableObject: public Object3D, SceneGraph::Drawable3D {
    public:
        explicit DrawableObject(
            const std::vector<Containers::Reference<GL::Mesh>>& meshes,
            const std::vector<MaterialData>& materials, Object3D* parent,
            SceneGraph::DrawableGroup3D* group);

        DrawableObject& setMeshes(
            const std::vector<Containers::Reference<GL::Mesh>>& meshes);
        DrawableObject& setMaterials(
            const std::vector<MaterialData>& materials);
        DrawableObject& setSoftBodies(const std::vector<bool>& softBody);
        DrawableObject& setTextures(std::vector<GL::Texture2D*>& textures);

    private:
        void draw(const Matrix4& transformationMatrix, SceneGraph::Camera3D& camera)
            override;

        Resource<Shaders::Phong> _colorShader;
        Resource<Shaders::Phong> _textureShader;
        std::vector<Containers::Reference<GL::Mesh>> _meshes;
        std::vector<MaterialData> _materials;
        std::vector<bool> _isSoftBody;
        std::vector<GL::Texture2D*> _textures;
};
Note that each DartIntegration::Object can contain multiple meshes with color or texture material. To keep track of which objects are being updated (this should only happen if the visual properties, that is the mesh or material information, of a body changes), we have defined a std::unordered_map:
std::unordered_map<DartIntegration::Object*, DrawableObject*> _drawableObjects;
To update the information of our objects (both the transformations but also the graphics part), we perform the following:
world->refresh();
To get and update the new meshes and material information, we perform something like the following:
/* For each updated object */
for(DartIntegration::Object& object: world->updatedShapeObjects()) {
    /* Get material information */
    std::vector<MaterialData> materials;
    std::vector<Containers::Reference<GL::Mesh>> meshes;
    std::vector<bool> isSoftBody;
    std::vector<L::Texture2D*> textures;
    for(std::size_t i = 0; i < object.drawData().meshes.size(); i++) {
        bool isColor = true;
        GL::Texture2D* texture = nullptr;
        if(object.drawData().materials[i].flags() &
            Trade::PhongMaterialData::Flag::DiffuseTexture)
        {
            Containers::Optional<GL::Texture2D>& entry = object.drawData()
                .textures[object.drawData().materials[i].diffuseTexture()];
            if(entry) {
                texture = &*entry;
                isColor = false;
            }
        }

        textures.push_back(texture);

        MaterialData mat;
        mat.ambientColor = object.drawData().materials[i].ambientColor().rgb();
        if(isColor)
            mat.diffuseColor = object.drawData().materials[i].diffuseColor().rgb();
        mat.specularColor = object.drawData().materials[i].specularColor().rgb();
        mat.shininess = object.drawData().materials[i].shininess();
        mat.scaling = object.drawData().scaling;

        /* Get the modified mesh */
        meshes.push_back(object.drawData().meshes[i]);
        materials.push_back(mat);
        isSoftBody.push_back(object.shapeNode()->getShape()->getType() ==
            dart::dynamics::SoftMeshShape::getStaticType());
    }

    /* Check if we already have it and then either add a new one or update
       the existing. We don't need the mesh / material / texture vectors
       anywhere else anymore, so move them in to avoid copies. */
    auto it = _drawableObjects.insert(std::make_pair(&object, nullptr));
    if(it.second) {
        auto drawableObj = new DrawableObject{
            std::move(meshes), std::move(materials),
            static_cast<Object3D*>(&(object.object())), &_drawables};
        drawableObj->setSoftBodies(std::move(isSoftBody));
        drawableObj->setTextures(std::move(textures));
        it.first->second = drawableObj;
    } else {
        (*it.first->second)
            .setMeshes(std::move(meshes))
            .setMaterials(std::move(materials))
            .setSoftBodies(std::move(isSoftBody))
            .setTextures(std::move(textures));
    }
}

world->clearUpdatedShapeObjects();
The DartIntegration::Object stores in memory the mesh, material and texture information and thus it is advised to keep references or pointers to these values. Putting everything together and with a few additional things (e.g., two lights), we can get something like the following:

Simulating any robot with the DartIntegration
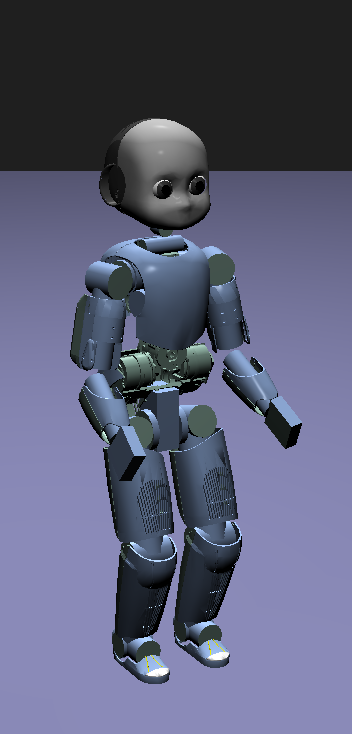
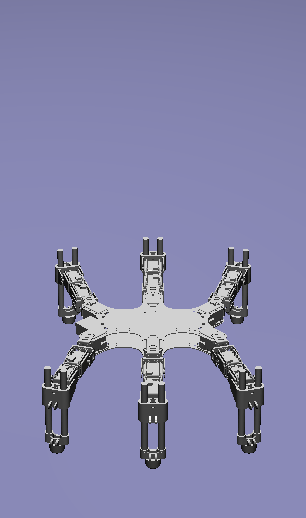
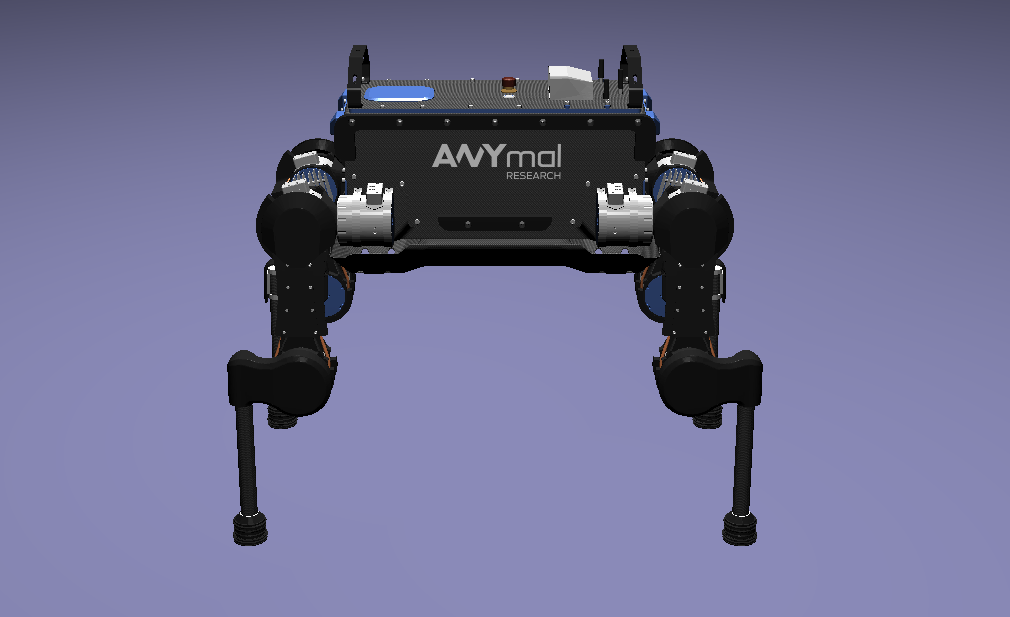
Using the exactly the same code (just changing the URDF file), we can load any robot in DART and render it with Magnum. Here are a few other examples rendering a humanoid (iCub), a hexapod and quadruped (ANYmal) robot:
Controlling a robotic manipulator
The example scene looks (relatively) nice, but up until now we cannot control what happens to our imaginary world. But most of the fun comes when we can control our robots and make them do things. In this second part of the post, we will see how we can control our manipulator in order to be able to give it intuitive commands to perform some everyday tasks.
As we have already discussed, our robot’s state can be described by its joint positions and its joint velocities. In the robotics literature, we find the notation for joint positions and for joint velocities.
Actuator types
Robots are mechanical structures that are interconnected and controlled via electrical components. This means that the lowest level control signal happens in current. Because handling current is difficult and non-intuitive, there are two types of motors widely used to provide a higher level of abstraction:
- Torque-controlled actuators; these actuators are equipped with a force/torque sensor and the higher level control signals are the desired torques/forces (depending on the type of the mechanical connection).
- Servo actuators; these actuators are equipped with an encoder sensor (that measures the displacement or current position of the joint) and the higher level control signals are the desired joint positions.
Controlling in joint space
The easiest type of control is to control the robot in what we call the joint-space. This basically means that we have some desired joint positions and some desired joint velocities (usually set to zero) and we want to find the control signal to achieve them.
When controlling in joint-space, the most classical controller is a Proportional–Integral–Derivative (PID) controller. In essence, the desired control signal (no matter the type) is computed as follows:
The user here will need to tune the parameters . In robotics, a variation of this control is widely used (usually named PD-controller):
Using these simple controllers, one can do some very amazing and interesting things.
Controlling in task space
However, most of the interesting things happen in the Cartesian 6D space. This is the space where the end-effector of our manipulator lives in. Moreover, this is the space where most of the real world tasks can be very intuitively described. For this reason, we call it the task-space.
Jacobian
Jacobian matrices are very useful, and heavily used in robotics engineering and research. Basically, a Jacobian defines the dynamic relationship between two different representations of a system. Formally, the Jacobian matrix is the first-order partial derivatives of a function with respect to some variables. Let’s take as an example our robotic manipulator. As we have already, we can describe its configuration by the joint positions . This configuration also gives a 6D position (that is, translation and orientation) for the end-effector, let’s call it . This relationship is known as the forward kinematics and is usually non-linear. The Jacobian matrix (which is a function), , gives us the following relationship:
With this last equation, we have an analytical equation that relates the joint velocities, to end-effector velocities . Moreover, this is a linear relationship. Using the property of conservation of energy (from traditional physics) and some mathematical manipulation, we can generalize this relationship to forces and torques (we drop the arguments in for clarity) as
where is the wrench (force and torque) applied on the end-effector. Using this equation we can plan our desired trajectories in the end-effector, write some controller in that space (like a PD controller that we saw previously), and then transform them to joint-space (the space that we can actually control).
But how do we get this Jacobian matrix? We will not go into the details, but once we have the forward kinematics of our robot (this is either measured or given by the manufacturer), then we just take the partial derivatives and we get our Jacobian.
Using DART to perform task-space control
DART has built-in functions that compute the Jacobian of any link of our robot, and thus controlling our robots in the task-space is quite easy. Here’s what we do:
/* Get joint velocities of manipulator */
Eigen::VectorXd dq = _model->getVelocities();

/* Get full (with orientation) Jacobian of our end-effector */
Eigen::MatrixXd J = _model->getBodyNode("iiwa_link_ee")->getWorldJacobian();

/* Get current state of the end-effector */
Eigen::MatrixXd currentWorldTransformation = _model->getBodyNode("iiwa_link_ee")
    ->getWorldTransform().matrix();
Eigen::VectorXd currentWorldPosition =
    currentWorldTransformation.block(0, 3, 3, 1);
Eigen::MatrixXd currentWorldOrientation =
    currentWorldTransformation.block(0, 0, 3, 3);
Eigen::VectorXd currentWorldSpatialVelocity = _model->getBodyNode("iiwa_link_ee")
    ->getSpatialVelocity(dart::dynamics::Frame::World(),
                         dart::dynamics::Frame::World());

/* Compute desired forces and torques */
Eigen::VectorXd linearError = _desiredPosition - currentWorldPosition;
/* PD controller in end-effector position */
Eigen::VectorXd desiredForces = _pLinearGain*linearError -
    _dLinearGain*currentWorldSpatialVelocity.tail(3);

/* Special care needs to be taken to compute orientation differences.
   We use the angle-axis representation */
Eigen::VectorXd orientationError =
    dart::math::logMap(_desiredOrientation*currentWorldOrientation.transpose());
/* PD controller in end-effector orientation */
Eigen::VectorXd desiredTorques = _pOrientationGain*orientationError -
    _dOrientationGain*currentWorldSpatialVelocity.head(3);

/* Combine forces and torques in one vector */
Eigen::VectorXd tau(6);
tau.head(3) = desiredTorques;
tau.tail(3) = desiredForces;

/* Compute final forces + gravity compensation + regularization */
forces = J.transpose()*tau + _model->getCoriolisAndGravityForces() -
    _dRegularization*dq;

/* Send commands to the robot */
_model->setCommands(forces);
For making the example, we had to do a few more things, like adding a few boxes, keeping track of their location and updating the desired end-effector location given the user input. Moreover, we added to our manipulator a gripper so that it can grasp the boxes. In reality, most commercially available grippers are position controlled (we cannot send torques as we were describing so far, but we need to give desired positions): to simulate that we use velocity control for the gripper and what we have been describing so far for the rest of the manipulator. For this reason, we need to keep a model of our manipulator without the gripper so that DART can gives us all the information we need cleanly and easily. There is a way to do it without a copy, but involves keeping track of frames and removing specific lines from the Jacobian, and thus, I chose the copy to be more clear.
Why DART and not Bullet?
Bullet Physics is one of the most popular open-source physics engines available and widely used in the graphics and game industry. Although choosing which physics library to use for a project depends on quite many parameters and factors, I am going to list a few reasons why I am using DART more actively than Bullet:
- DART is oriented towards computer animation and robotics. This means that
it already has implemented a wide range of functionality that is needed for
these areas. A few examples consist:
- Forward/Inverse kinematics,
- Forward dynamics,
- Jacobians and their derivatives,
- Robot dynamics quantities (like mass matrix, coriolis and gravity forces, etc.),
- Efficient implementation for rigid body chains (although Bullet has recently added this feature),
- Motion planning.
- Modern C++11/14 code,
- Accurate and stable dynamics for rigid body chains (robotic systems).
Although Bullet is moving towards supporting most of the features that DART already has, to me as a roboticist I find DART more intuitive and closer to my mind of thinking. Nevertheless, if someone is aiming for big open worlds (e.g., like in The Elder Scrolls: Skyrim) or many objects interacting with each other, DART is not designed for this type of situations and Bullet will be significantly faster (possibly less accurate though).
~ ~ ~
Thank you for reading! Be sure to check out the full example code, build it on your machine and play around with its controls.
About the author
Konstantinos Chatzilygeroudis loves to program robots, C++ and has a hidden love for computer graphics. Post-doctoral fellow in robotics and machine learning at LASA team, EPFL. Follow him on Twitter: @chatzilyge

Guest Posts
This is a guest post by an external author. Do you also have something interesting to say? A success story worth sharing? We’ll be happy to publish it. See the introductory post for details.